The BrowserUp Command Line Interface (CLI) is how you:
- Create test configs (browserup.load.yaml)
- Launch (deploy) the test cluster in local docker, or Amazon AWS
- Start and Stop tests, and more
Once the test cluster runs, you can view results, create reports, and administer users all via the web UI.
We’ll walk through a quick start to get you up and running with a test in minutes. This is a local (Docker) test, but the process is the same for a remote test, except you’ll need AWS credentials
Let’s go!
Prerequisites
The CLI is installed via NPM.
If Javascript is not your thing, don’t worry, you don’t need to know Javascript! NPM is just how you install the CLI.
Requirements:
Local Installation (Docker):
- Docker installed and running (current version)
- 32 GB RAM or more (recommended)
Cloud Cluster:
- Amazon AWS account
- Windows, Mac or Linux to operate the BrowserUp CLI
- Local Docker is not required for remote AWS execution, which keeps CI/CD setup simple
Installation
npm install -g browserup
Install the local docker images
browserup cluster install
This will download the docker images locally into Docker. Grab a coffee! This will take several minutes, but you won’t need to do it again.
Creating your First Test
- Generate a basic test scaffold:
mkdir demo
cd demo
To see a list of test examples, let’s call init with -h, for help:
browserup load init -h
Let’s make a test with Playwright using JavaScript and PostMan:
browserup load init --playwright-js --postman
You should see the test files in your working directory as well as a browserup.load.yaml, which is the test config. The browserup.load.yaml config file defines what will be run for this test.
Run cat browserup.load.yaml to see what’s in it, or open it in your favorite editor.
- Run your test!
browserup load start -d
The start command, when passed -d will run the deploy command if your cluster is not already running.
This will take a couple minutes to start, and launch your test.
When the start command finishes, you are running a test and collecting live stats. Let’s take a look!
Inspecting the Test Run
Visit http://localhost:23000/
Login
username: superadmin
password: changeme!
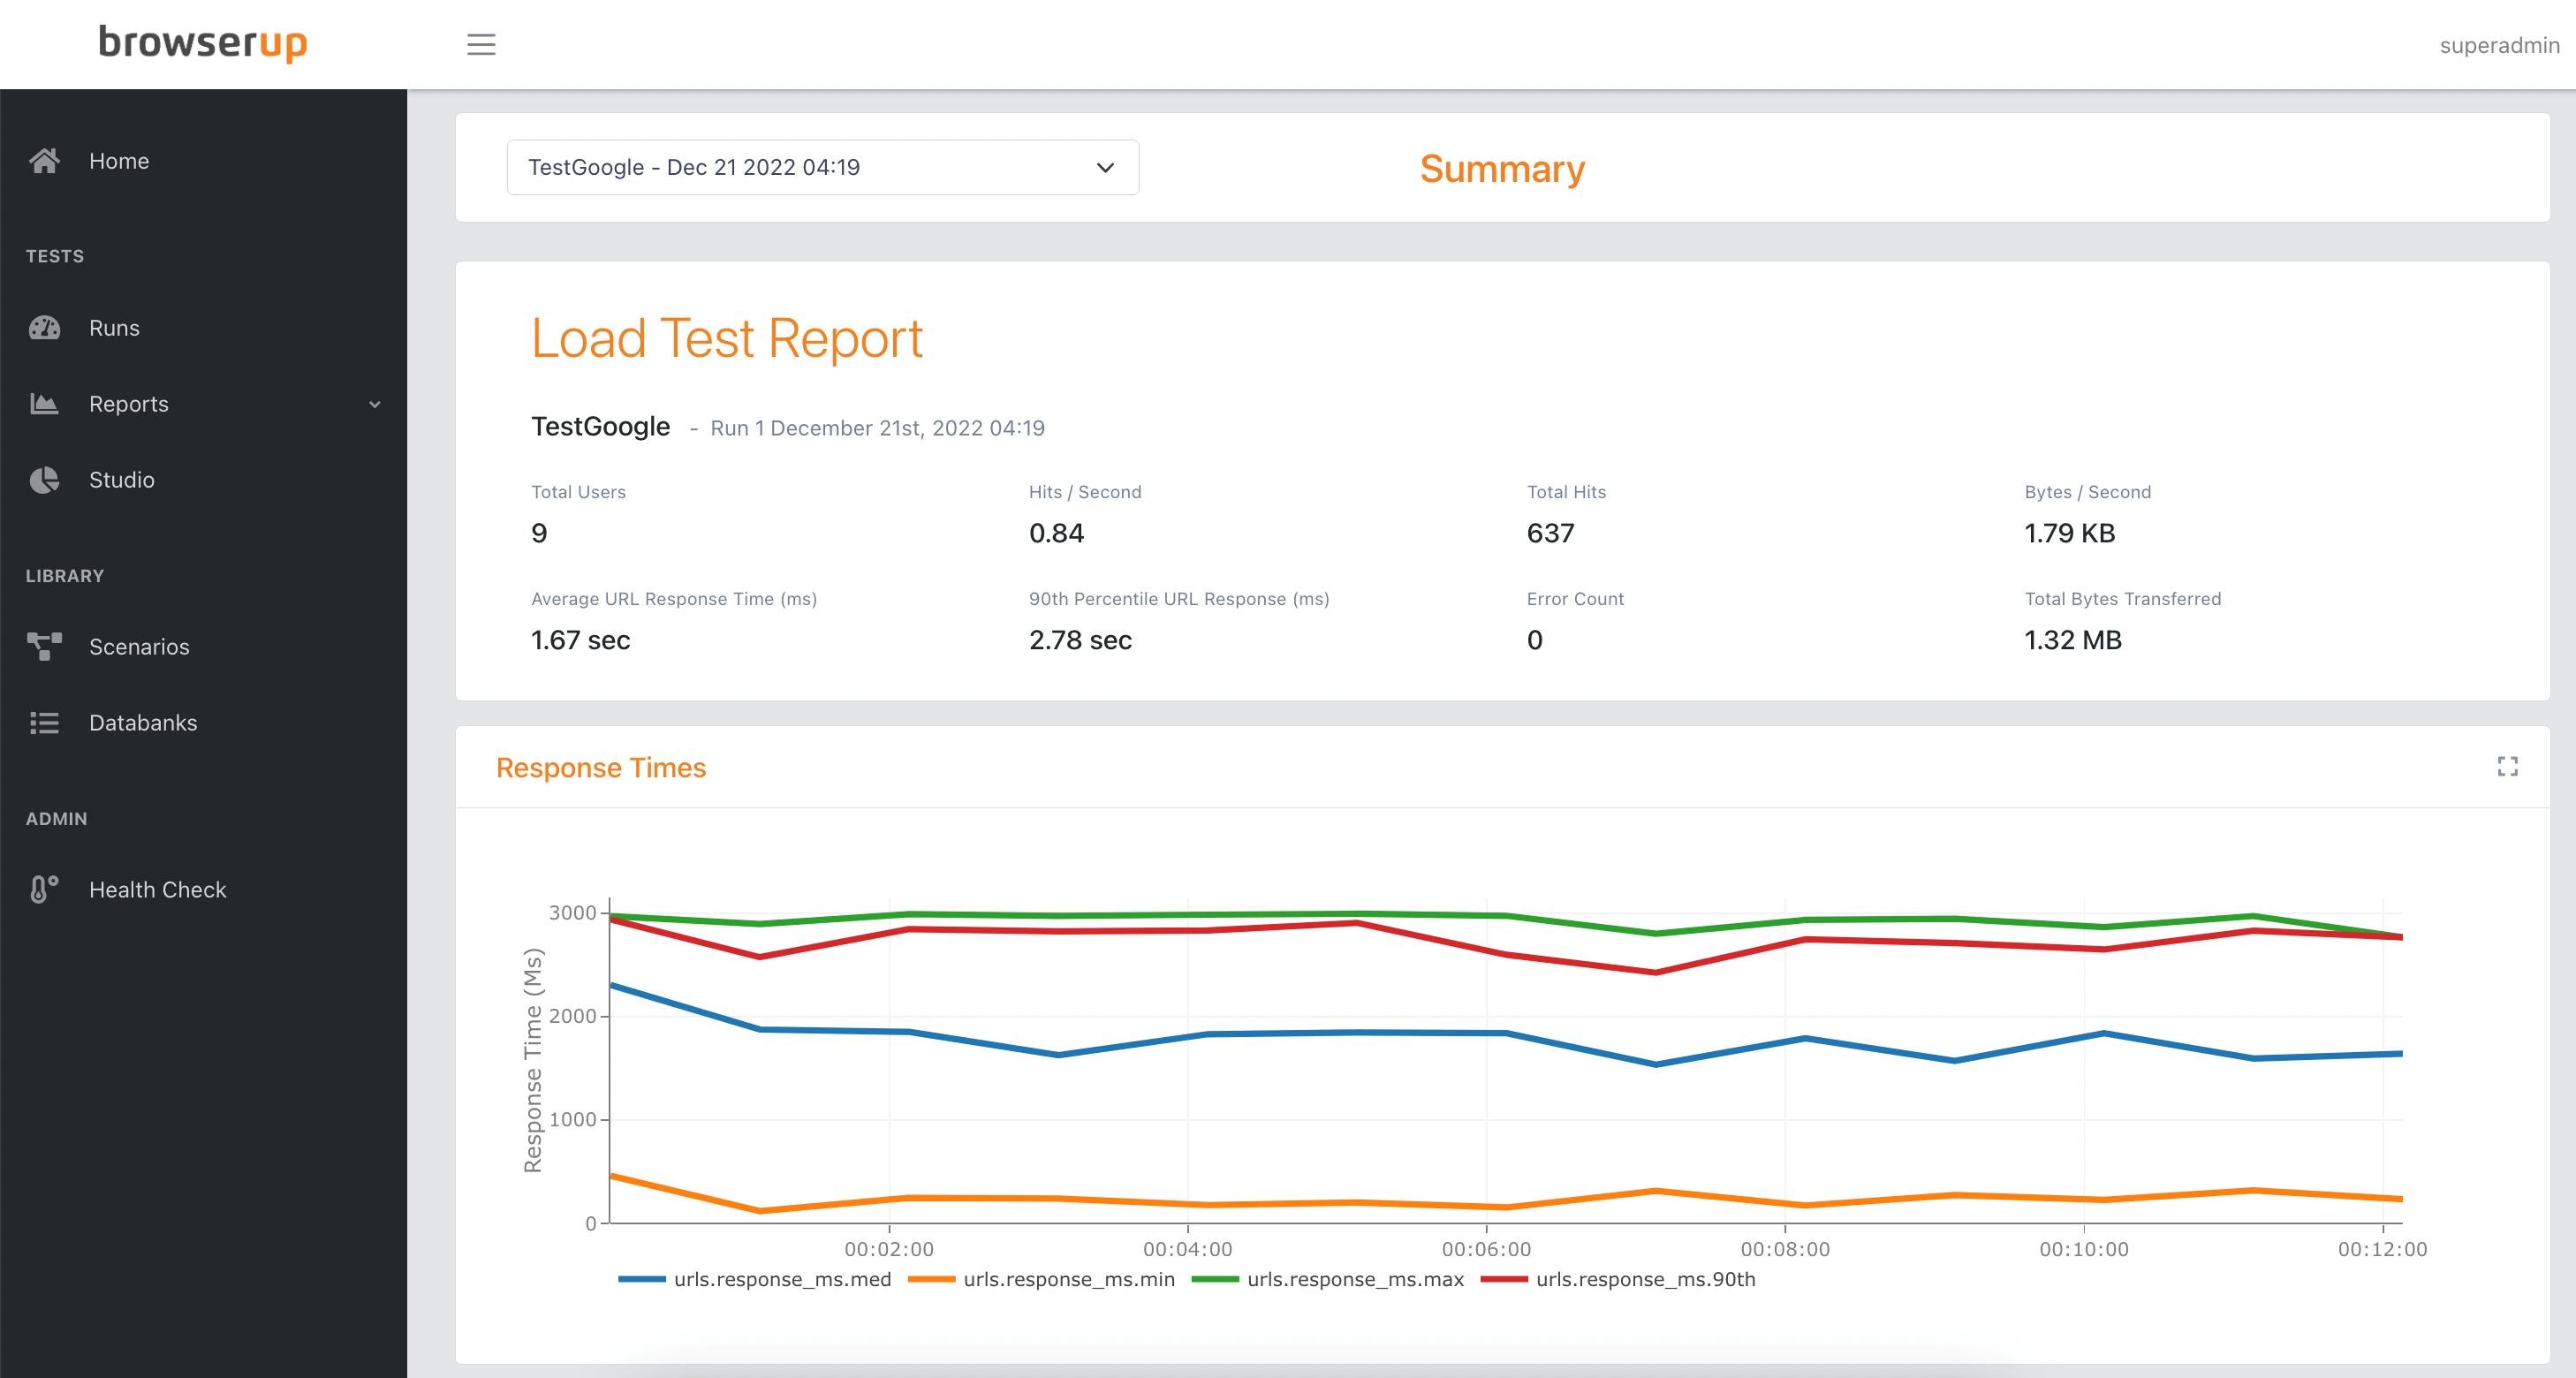
- Click on Reports -> Summary in the left sidebar menu
- Select the Run in the drop-down at the top and view the Summary Report
- Explore the other reports for this run
- Stop the test (pass -d to also destroy the cluster)
browserup load stop -d
That’s it! You’ve run your first test!
Cloud Runs
This quick start focused on a local Docker run, but the process for a remote run is the same, except you’ll need AWS credentials defined, and to set in your browserup.load.yaml:
cluster_type: aws
Issues?
If you find any issues, report them here